Monday, October 31, 2005

Yes sir, more Sideshow! Alive!

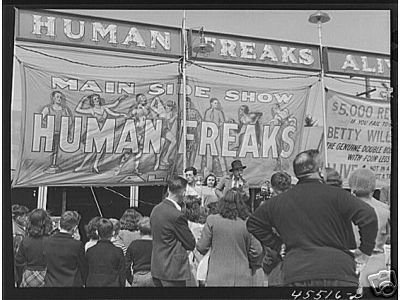
Okay, so I have a little more sideshow stuff to show and tell. Can you believe that an actual sideshow did come to town the last week of October to my town's annual fair?! I was soo sad when the original sideshow that used to come retired back in 2003 and that sadness was one of my inspirations for our Halloween Sideshow costumes. I then find out it has been resurrected in a different form and is going to be here on the last weekend when I arrive back home! Before, it was more of a badly done museum of sorts. Like having a head of a woman mannequin attached to a taxidermified snake body in an aquarium. The only live people were the outside talker, (Ward Hall) the fire eating little person, (Poobah) and Bruce the fat man. Now a set of young folks have revived the show by doing a '10 in 1' set of acts.
They give a brief history of the sideshow and demonstrate some of the old tricks and gadgets used in the past. Shown here is a device that has a crank on it and it appears to the viewer that the seated person's head is being turned all the way around.

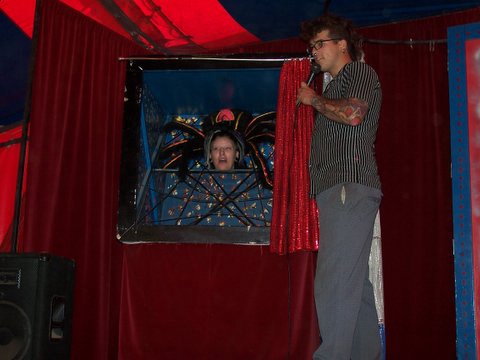
This was my favorite optical illusion. The Headless woman..Alive but how?
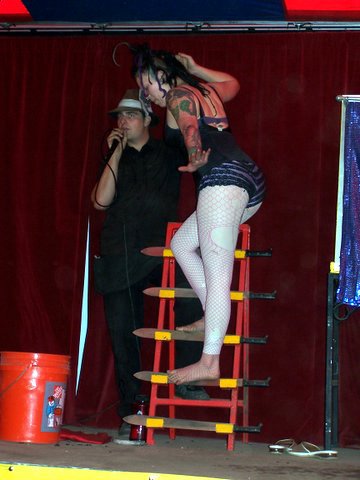

All of the 3 performers each did physical feats . Here is the climbing of a ladder of knives....Barefoot!


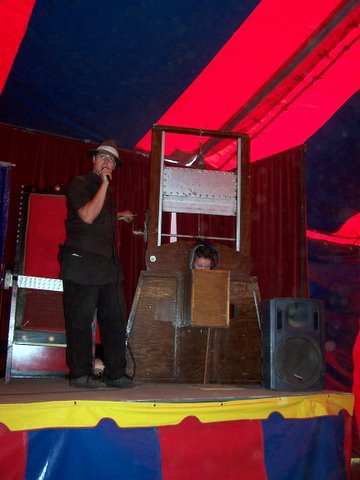
The 'off with her head' guillotine illusion.


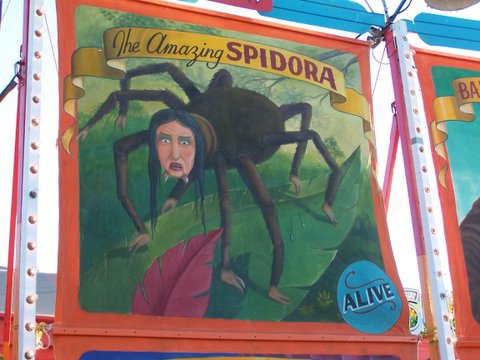
He he! Love it! Spidora.. Like my Spiderella! I so so wish I could have befriended these folks and got my picture taken in this!

And of coarse the beautiful banner artwork!


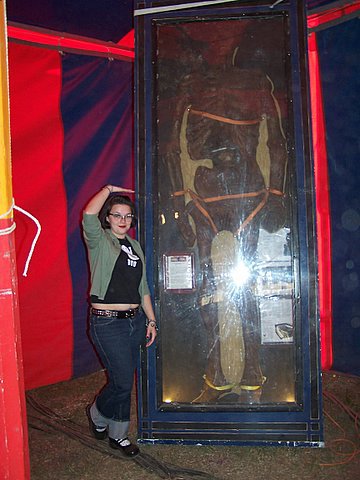
Here I am with the only museum piece they had on display. A replica of a 8 foot woman. (Please pay no attention to my stomach buldge! ah hem.)


The performers made alot of funny jokes during the show, it was such fun! Although, I really did miss all of the badly done museum artifacts! Here is an article about this sideshow when it first retired in 2003 : The Last Sideshow

Here are some neat audio examples of outside talker ballys: Art of the Outside Talker

Step Right Up!


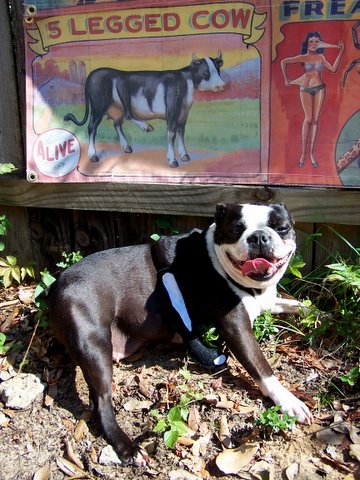
Step right up Ladies and Gentlemen! See for yourself, unusual people and creatures of the world! For Halloween this year it's a traveling Side Show! Pumkinbutt was a Organ Grinder Monkey. Daisy was an oddity of nature having 5 legs. And I was the tattooed, snake charmer.
See in person! A Monkeyboy dance a jig for you for mere goldfish crackers!
My mom made Pumkinbutt's costume. We actually got professional pictures of him made wearing it and once those are in I'll put them up so to show the whole cuteness of the costume.
How is it possible!? A domesticated animal born with 5 legs!
Here is Daisy with her extra leg, I was going to put a cow bell around her neck so she could be the 5 legged cow as seen on the banner, but a 5 legged Boston terrier is just as cute! Her extra leg was made possible with felt, hot glue and elastic.
Alive and In person! She is covered nearly head to toe in beautiful tattoos. Why? Also see her tame a wild cobra with the twist of her wrist! (Me in all my 'tattooed' glory. I made the tattoos out of panty hose and cut out's from this fabric and flexible glue. The tattoos on my chest are from my birthday gifts.)

Behold...The extra special attraction!
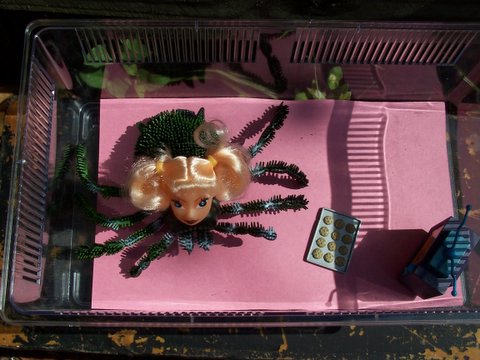
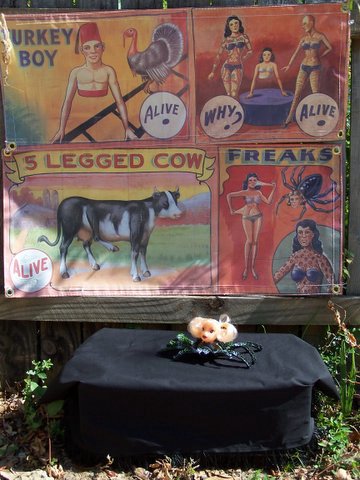
Recovered in the swamps of southern Louisiana, living off of crickets, we bring you the beautiful mutation, Spinderella! The head of a pretty girl with the body of a hideous spider!

She enjoys watching 'Ichy and Scratchy' cartoons and baking cookies in her spare time.

(Note her predecessor on the banner in the background)


"Hello dah-lings! Enjoy the show!"
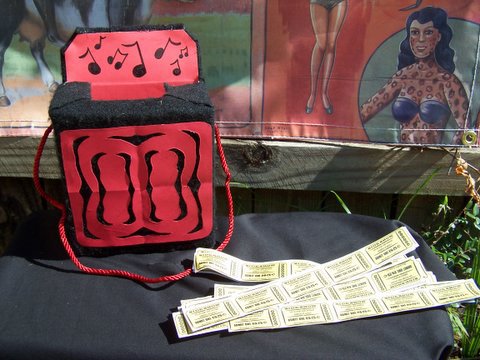
For Pumkinbutt's candy container, I made him a little organ grinder box. I'm not crazy happy about how it turned out but it served it's purpose. I put a red glow stick inside it and that kinda looked neat.
We also had tickets we gave out for payment of candy.

My stepfather is a computer graphic artist and also works for a canvas company. So he made the tickets and banners. He made the entire ticket design himself on the computer (I wish I had a better close up of them, because they looked so 'real') The banner seen on the top of this post was on the back of the wagon and the 'turkey boy, why, alive girls' banner was on the other side of the wagon not shown in the group photo.
Ok, Folks, If you could make your way to the exit on your left.....And don't forget to tell your friends about your amazing experience!

Tie One On ~ Mixed Media Apron

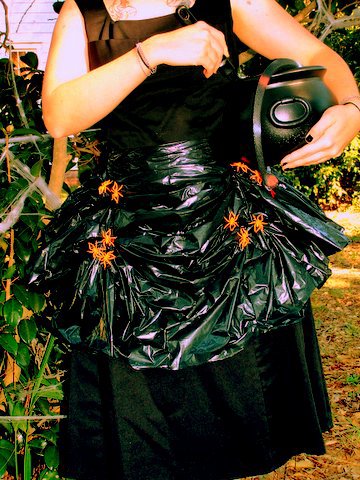
I know... I already did a Halloween apron last month but I just had to! I decided to really make it 'mixed media' by not using any fabric or sewing of any kind. It is made out of a black plastic trash bag, purple staples and orange plastic spider rings. The tie on it is actually the draw string closure. I cut the bag up the sides and horizontal under the back side of the draw string. Then snipped the draw string in the back so it could be tied. I then gathered it and stapled it to give it the ruffle~y look. Then stapled the spider rings in the folds. No fabric, No sewing! And it only took about 30 minutes to make. It reminds me of what a witch might wear while stirring her up some brew! And a big hint as to this year's Halloween costuming...I will work on getting that post up in the next couple of days...

Saturday, October 29, 2005

I'm Back!

I'm baaaaack!!!
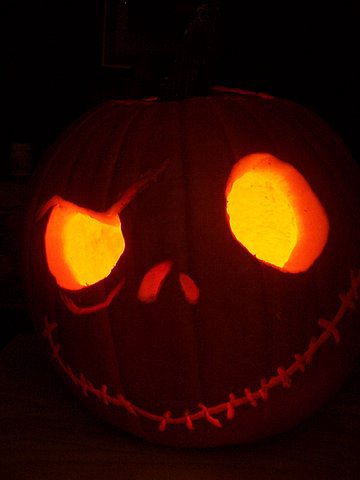
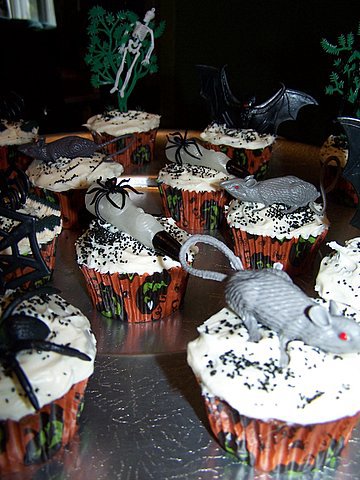
Enjoy my Jack Skellington o' lantern and some spooky cupcakes for now!
will have lots to show next week!


The severed witch's finger with a spider ring was my fave!

Friday, September 30, 2005

On the road again!


I will be gone for the whole month of October. Pumpkin butt and I are going to my mom's to help her out after having shoulder surgery. I went up there the summer before last when she had her other shoulder done so I know that I will have NO time to do anything on here unfortunately. I am going to be using any free moments I have working on costuming!!

Tie One On ~ Tea Towel Apron


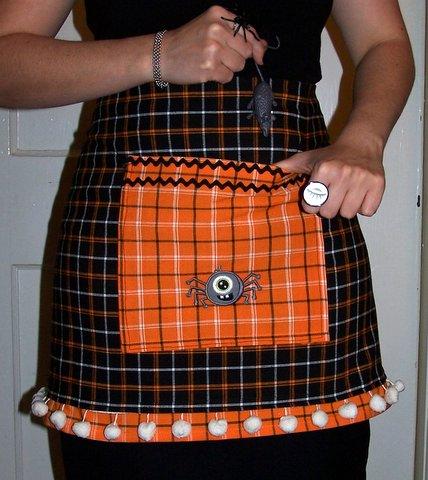
I got these towels at target. The towel selection out there right now is really poor so I have a bad feeling I'm not going to be the only one with these towels made into an apron. Making an apron out of a tea towel was so fun...I think I might be using this 'shortcut' again on future submissions. It let me have more time for adding trims and cute stuff rather than dealing so much with making just the apron. This is an apron that I will really enjoy wearing for the whole month of October! It can be worn as a hostess apron or for Halloween night, or for just making some of those cool monster creep cakes from the new MS Kids(shown below)! I made a big pocket in the front to put Halloween treats in (along with a couple of tricks! Like plastic snakes, spiders and rats!)

Wednesday, September 28, 2005

Multi-tasking tooo much!

I have been so busy lately that I just realized that I have been leaving out lots of pertinent info in my posts...(and thanks to those who let me know about some of it!) Like the name of a recipe and the recipe it's self! I have also been rushing through when writing them which makes for boring reading. I took a few moments to update this post and this post. I have been having trouble focusing while writing lately because my mind starts wandering off thinking about all the other stuff I need to do. But from here on out..It's nothing but quality at 'My House Is Cuter Than Yours', nothing but the finest crafts made from trash and the best cheap marshmallows money can buy!

Scrap Crafty~Foil Pan Jewelry

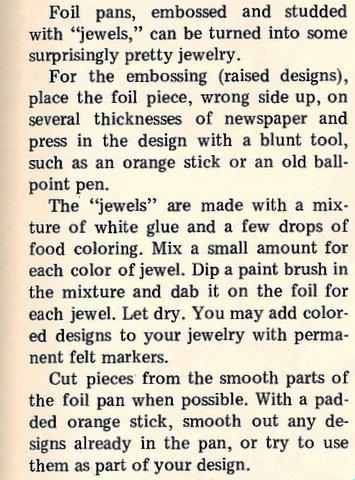
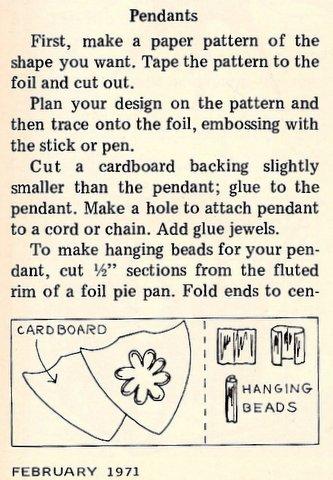
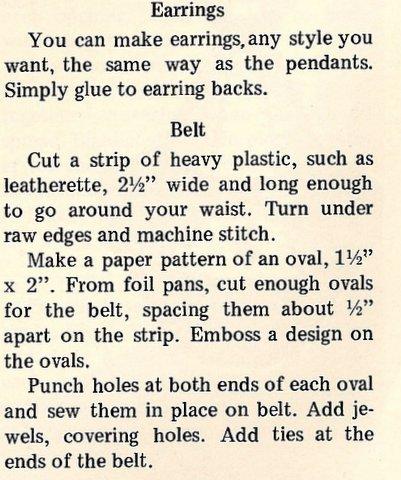
I wanted all the Scrap Crafty' s for this month to be Halloween related. The foil pan jewelry would be a great and cheap way to make some accessories for a costume. I found this in "Pack-o-fun" Feb. 1971.


Adding glitter to the glue jewels would be neat. I also think that the bracelet could be cut from some sort of plastic container or maybe from a cardboard Pringles containers. Cutting up a metal can only sounds like a trip to the emergency room.
Aluminum foil also could be used to cover objects to be turned into props. For a royal costume a scepter could be made by covering a stick with foil then a small ball of aluminum foil on top, decorate with scraps of ribbon. A crown could also be fashioned from foil pans or aluminum covered cardboard. (Does Burger King still give out paper crowns? If so, one of those could be used as a template or just covered in foil) A chest plate for a gladiator could be made from posterboard (as a base) then covered in aluminum foil decorated with embossing and jewels. Use grey or black duct tape to make the straps.
I am all about making costumes as cheap as possible. When planning a Halloween costume look for things already at hand that with a little imagination can be transformed into a part of the costume. Thrift stores are a great place to get clothing or props. Just add a little trim or other details to spiff them up. There's nothing wrong with buying or renting one key piece from a costume shop (like a Napoleon wig, I saw them at Spencer's and I think target has a knock off) but don't get sucked into buying the whole outfit from there...not that is a hint about halloween costuming for this year...

Monday, September 26, 2005

Tomato Soup Cake

A cake made with tomato soup!? I made this last night but made sure to keep the 'secret ingredient' from my victims until after they ate it! I didn't want them to already expect it to taste like tomatoes with icing. Not too appetite appeasing! They really liked it and were more amazed than disgusted by the fact it had soup in it. So...Okay..The end.. Oh, you want to know how it tasted? Well, actually, it tasted like a carrot spice cake! Really! It is the first cake that I have made that wasn't from a box and it was just a little dry but that could have been my fault. I think I might have let it bake a schmingeon too long. Here is the recipe if you dare:
*********************************************
Tomato Soup Cake
2 cups sifted cake flour 1/2 teaspoon nutmeg
1 tablespoon baking powder
1/2 teaspoon soda
1/2 teaspoon powdered cloves
1/2 teaspoon cinnamon or mace
1 can (1 1/4 cups) condensed tomato soup
1 cup seedless raisins
1/2 cup shortening
1 cup sugar
2 eggs, well beaten

Sift together flour, baking powder, soda, and spices. Wash and cut raisins.(roll in a small amount of the flour mixture.)Cream shorting; add sugar gradually; then eggs, mixing thoroughly. Add flour mixture alternately with soup; stir until smooth. Fold in raisins. Pour into two greased and floured 8-inch layer pans; bake in a moderate oven (375 degrees) about 35 minutes, or until done. 8 servings. Frost as desired.(I used premade cream cheese frosting, which I think kinda helped give the taste illusion of carrot cake)

*****************************************************
Of coarse, I didn't follow the recipe completely. Like I say "a recipe is only suggestions". Instead of powdered cloves , I just added an schminge more cinnamon and nutmeg. And, by the way, I assumed that they meant baking soda not Dr. Pepper! But I do have a cook booklet that is all about cooking with Dr. Pepper and it has a cake recipe in it..........Okay, must locate it and make Dr.Pepper cake has been added to my To-Do list!

Wednesday, September 21, 2005

Scrap Crafty~Halloween Treat Tree Center-Piece

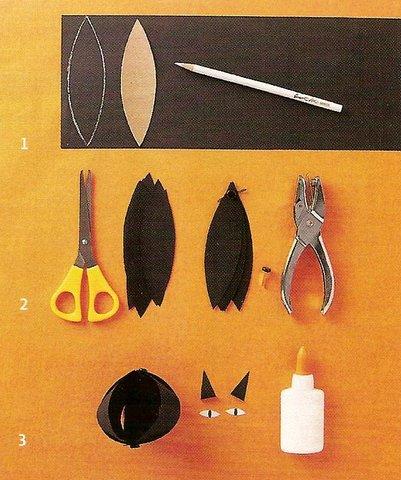
This idea is from the new edition of Martha Stewart's Kids magazine. If you already have the magazine sorry for giving out 'old news'. I think it is so clever! "For the tree, spray-paint a branch black; wedge into a flower bucket filled with rocks. Cover with Spanish moss, and stretch craft store cobwebs between branches."

For the cat and pumpkin ornaments make a template that looks like the image in #1 ( the magazine has a template but it looks fairly easy to do without it) Trace the image 7 times onto black construction paper.Cut out. Stack pieces (#2) and punch holes through both ends with a small hole punch; insert a black or orange paper fastener into each hole (the paper fastener they speak of is made of metal and has a round flat head and 2 thin metal tabs underneath, they are always used in kids crafts to make jointed paper people and creatures). Bend stack into a "C" shape (#3); and fan out like a globe. Glue on paper features to create the cat and pumpin faces.

Also shown on the tree are small craft paper goody bags with hand stamped names and matching tags.


Don't forget to add some spiders,as shown, for extra spookiness!

Monday, September 19, 2005

Yay! Birthday goodies!

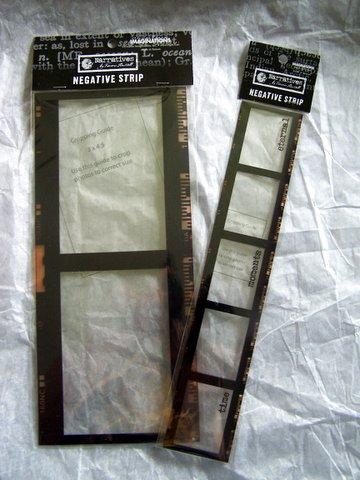
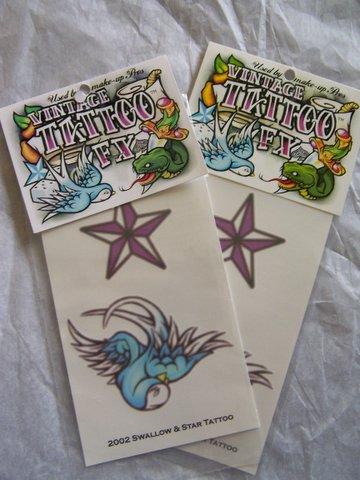
My birthday was a couple of weeks ago. I just got the last of my gifts this weekend so now I can show all of it together! first up is these plastic sleeves for photos that look like camera film negatives! i got a couple in both sizes. The smaller ones work great for photo booth pictures. Only thing I can't stand about them is that they have stupid words running vertical like "eternal" and "moments". If I ever find out the person responsible for every single scrapbook thing having these type stupid words on them, I am going to hurt them real bad. But I have a few plans for removing it! (ok, while I'm on the subject it drives me nuts when I see a scrap book page with definitions from a dictionary. For instance there will be a picture of a baby crying and then a "tore out" definition of the word 'crying'. C'mon folks, we're not idiots, we can obviously see that the baby is crying! Why not try getting a little more creative!....Sorry for the outburst....Back to our story) My friend Heather gave me the coolest gifts ever! Some painfree tattoos (ha ha)!
And two awesome hand crafted trinkets. Seen in the tin (that she also specially made). Near the bottom is a cool bracelet made with ribbon and coke can tabs. (I couldn't get it to photograph very well at this moment but I will try again later and post it)
Then! Look at this! A sweater guard! SHE MADE THIS! I think it is soo lovely! It is made from shrinky dinks, ball chain and clips.
I also got a total of $70 in cash and a gift card (to target) from my mom! I got a few Halloween things like tiny plastic bats and rats, some new tees, some toys for my son, and the Roseanne season 1 on DVD. I spent it all at target! I just went there this morning and saw all the Halloween stuff. I was a little disappointed. That stuff they have that looks all country with felt and stitches, is a slap in Halloween's face! And they have too much of it! But there are a few things I like: the cute little vampire, cat, spider and other creatures they have for their Target brand stuff. I also liked the metal bat luminaries (they come in a hanging form and on a rod that gets stuck into the dirt). It's actually best that there's not too much I like because I would be spending money I don't have!

blah..blah..blah.

Friday, September 16, 2005

What started it all~Ham Asparagus Shortcakes

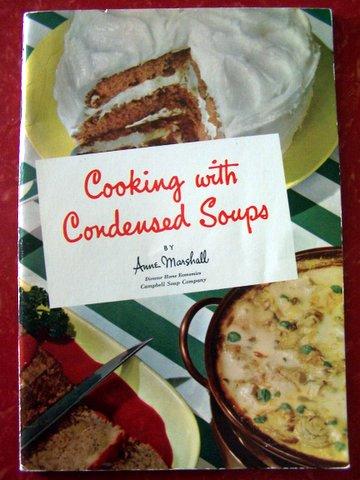
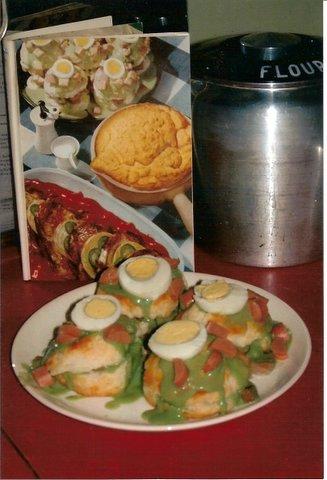
I had been collecting these old cookbooks and booklets for a while just to look at the pictures. Three years ago, I found the cook booklet shown above, 'Cooking with Condensed Soups', at the Sal-Army. I was flipping through it and found a picture of a hideous looking meal~Ham Asparagus Shortcakes. I thought to myself, Did people really eat this stuff and what did it taste like? I then, made it my mission to make that particular dish for dinner that night.
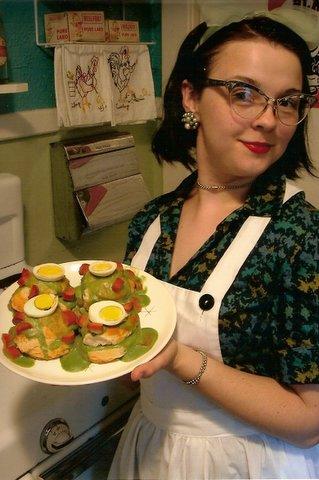
The recipe called for cream of asparagus soup which wasn't being made anymore ( however, I just saw it recently). So I added green food coloring to cream of chicken soup. Looks ever more hideous than the real photo! I must admit i didn't care for it. It was only a photo prop for me. Ha Ha!

************************************************
Ham Asparagus Shortcakes

6 shortcakes baked
1 can (1 1/4 cups) condensed cream of asparagus soup
1/4 cup of milk
3/4 cup diced cooked ham
3 hard boiled eggs, sliced

Make shortcakes from packaged biscuit mix (omit sugar) ; bake, split and butter. Meanwhile, combine soup and milk; mix well and heat. Add ham and cook slowly for 5 minutes. Add egg slices just before serving, saving several to garnish shortcakes. Place half of the ham filling between shortcakes and the other half over the top. Garnish with remaining egg slices and serve hot. 6 servings.
*********************************************

I had so much fun making the dish and taking photos. And there is where the madness started! Did you notice that on the cover is a cake...And it's a booklet on cooking with soup! I need to look that recipe up for sure! Maybe it's actually a meat loaf with mashed potatoes for "icing"......Very interesting....

Wednesday, September 14, 2005

Scrap crafty~Marshmallow Creatures

I love Scrap Craft! It is so great for holiday and party decorating when you're on a budget! It's also great to keep the little hands around the house busy!
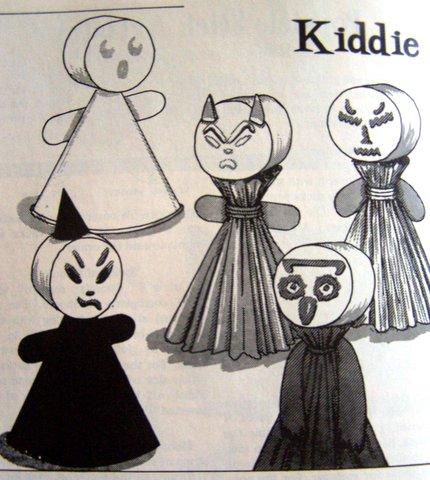
Shown above are "Marshmallow Creatures". These would be really fun for a child's Halloween party. This idea is from the "pack-O-fun" magazine, Oct. 1971. "pack-O-fun" is still made today and I have seen it for sale at Hobby Lobby. Here are the instructions:
*****************************************************************
"Push marshmallow heads on top of soda straws, about 3" long. Draw on features with a toothpick dipped in frosting, or use frosting directly from a tube. Use frosting for gluing. The devil's horns are halves of candy corn; the witch's hat is the top of a paper cone. Use cone-shaped paper drinking cups for the bodies of the creature, or you can make a cone from a 4" square of fairly stiff paper. Cut the tip of of the cone and insert the soda straw down through it. For fancy, dressed-up creatures, make full crepe paper skirts. To make each skirt, take a strip of colorful crepe paper about 3" wide. Gather along one edge and secure it around the soda straw body with a rubber band or string. From paper, cut out small ovals for the creatures' arms. Cut long, jagged ovals for the owl's wings. Glue all in place."
*******************************************************************
If you were like me... I had no idea what kind of creature that was on the bottom right. Oh, it's an Owl!? I'm glad they cleared that up! I also don't think that toothpick dipped in icing is such a good idea. I think using different shaped candies and cereals would be a better idea.
I am thinking about doing a post every Wed. called "Scrap Crafty". If anyone ever makes any of my ideas email me a pic and I'll put it up along with the corresponding post!

Monday, September 12, 2005

Sarah Hutt


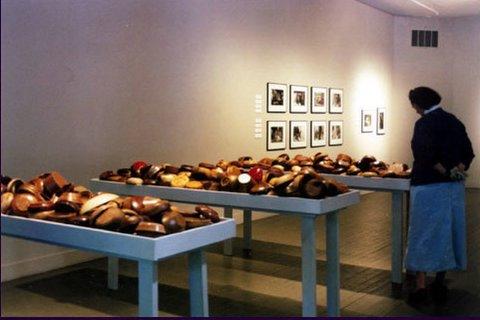
While I was researching shrinky dink stuff I happened to stumble across this AMAZING exhibition.
Artist statement:
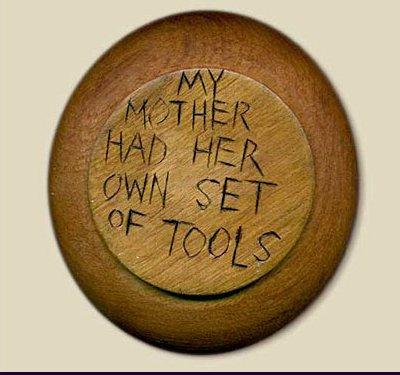
"My Mother's Legacy" is a 1,000 line poem wood-burned into the bottom of 1,000 wooden bowls. On each bowl is written a line from my memory that reflects a mannerism, advice, or a remark I attribute to my mother. The bowls are piled randomly onto tables, where the viewer must pick up each bowl to read it. The act of lifting each bowl reminds me of my mother, because she had the habit of turning things over to see where they were made.
When my mother died of breast cancer in 1965 she was 47 and I was 13. Over the years, I carried around a lot of memory fragments. But I could not fit them together to fully understand who my mother had been as a person. In 1995, to commemorate the anniversary of her death, I began to write down all the things I did remember.
These are the lines that became "My Mother's Legacy". By artist Sarah Hutt
Sarah Hutt's mother...She looks like a real sassy dame!
I can't begin to describe how much I was moved by this installation. I have my degree in fine art and Sarah Hutt's work reminded me soo much of something I would do. My work always had some domestic aspect to it, whether it be a house form or an actual installation of old worn furniture. I love her artist statement, I always gag when I hear pretentious statements that go round and round and never give any explanations or are just a waste of the readers/viewers time. I was so moved by "my mother's legacy" that I sent Sarah Hutt an email letting her know(and she wrote me back). I would love to see this exhibit up close and read all the bowls. I love viewer interaction, I love that the viewer interaction for this exhibit is an action that her mother did in life. I love that she burned the words on the bowls...Like burning ones memories in their minds. I love that there are soo many bowls...One thing I learned from art school is that there is power in numbers. I am also just moved by the sadness that she lost her mother at such a young age. "My Mother's Legacy" is sad and beautiful at the same time.