Friday, October 03, 2014

Welcome Foolish Mortals!


To start this Halloween season off proper, I take you to a circa 1906, quite possibly haunted, mansion! Enjoy this delightful House of Horrors song while creeping through!

A couple of weeks ago I went to an estate sale at this house.  I don't think anyone, alive, has been in this house for 30 years.  The rooms had numbers on the doors, so I assume it was a Mrs. Mendlebright's Boarding House at one time.  Lots of beautiful millwork and lots of creepy unlit areas.  
Let us now venture ahead!
When hinges creek in doorless chambers...
and strange and frightening sounds echo through the halls...
Whenever candlelights flicker where the air is deadly still- that is the time when ghosts are present!
Welcome foolish mortals, to the Haunted Mansion!
Kindly step in please, and make room for everyone....There's no turning back now!
We spirits haunt our best in gloomy darkness.
We find it delightfully unlivable here in this ghostly retreat...
Every room has wall to wall creeps....
And hot and cold running chills!

Look alive..and we will continue our little tour!
When the crypt doors creak and the tombstones quake,
Don't close your eyes and don't try to hide!  For a silly spook may sit by your side!
Shrouded in a daft disguise, they pretend to terrorize!

Our library is well-stocked with priceless first editions.  Only ghost stories of course!

There are 999 happy haunts here...but there is room for a thousand! Any volunteers?!
If you should decide to join us, final arrangements may be made at the end of the tour ! 
We've been dying.... to have you!
Rest in peace, the haunting's free!  So hurry back, we would like your company!

Be sure to bring your death certificate if you decide to join us!
There's a little matter I forgot to mention.  Beware of hitchhiking ghosts!

Here is a portrait still hanging in the parlor showing the house in well-cared-for days.  Everything in the house was for sale.  Including the doors, tubs, toilets, fireplaces and fixtures .  I heard from one of the employees that the house was going to be torn down. Boo! The sale was for three days and I went every day just to hang out in the house.  Some parts were blocked off due to structural issues.  I tried to find the entrance to the attic but it must have been in the forbidden section.  I bought a few things that I will post next.
***
On a side note, I love checking the pockets of old coats!  There were four of these vintage beauties at the sale.  The prizes in the pockets: several balled up keenex tissues and a folded up unused plastic rain bonnet.  I don't expect to find a hundred dollar bill, just part of a story and a peak into the previous owner's life.  This one had the sniffles and expected rain.

Estate Sale Goods

Everything was for sale as I mentioned previously, including old jars of expired medicine from 1954.  I considered buying a bunch of it and putting them in our bathroom medicine cabinet for when we have visitors over and they happen to check inside.  Then I remembered we don't have any friends that would be surprised by that.
So on to the goods.  As some may know of my obsession with old food packaging and then you can understand why I bought an old mayo jar.  It was located in the creepiest room of the house.  It was the picture of the gurney with old jars on it.  I seriously got weird vibes off of that room.  PB wouldn't go near it.

I didn't see this glass on the first day of the sale but found it on day three (half price day) so it was 1.50.

I got Hubs this super cool black and orange skinny tie. Just in time for Halloween!
I like the serving suggestion of wearing it with a blue or grey suit!

I bought a big ziplock bag full of 'still in package' items. 
Mastro Spring Clothes pins:

Little Octopus Soap Holder:
This is so cute!
The back has cute graphics.

A Fowl Lacer:
Because all fowls need lacing.

Needle kit:

Ironing Board Cover Fasteners:
I could actually use these, but not sure I want to take them out of the package.

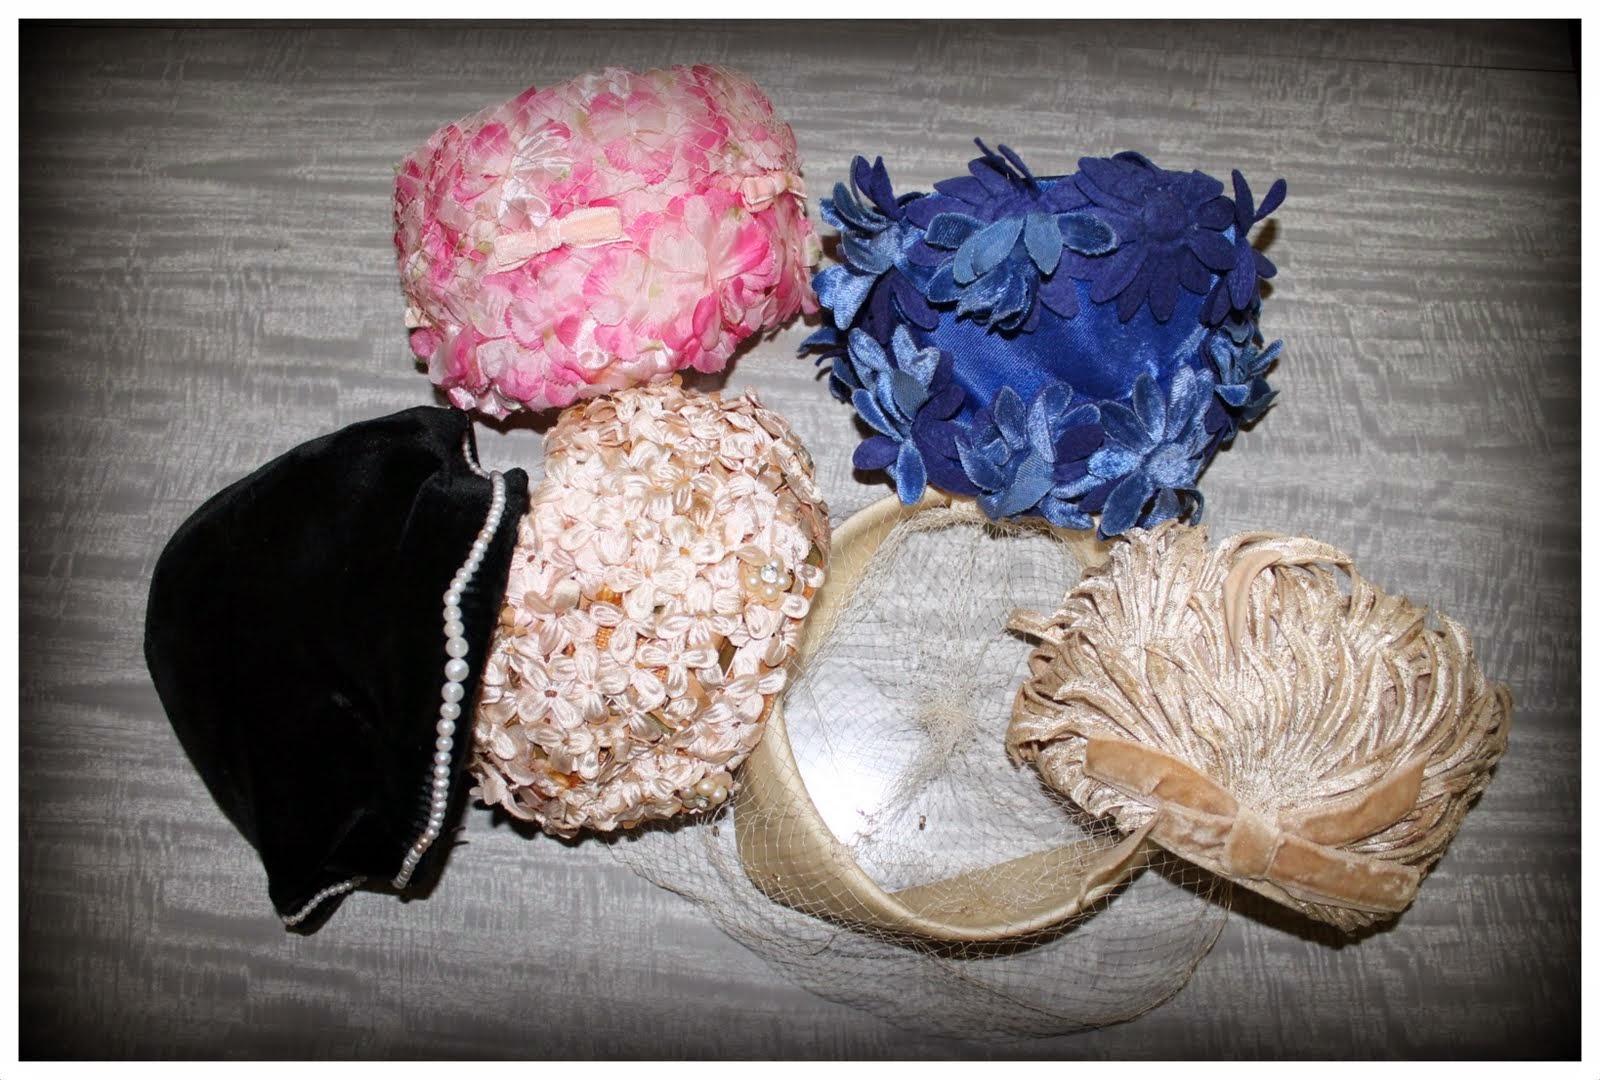
There were a crap ton of hats for sale.  I picked out a few that looked good on my head regardless of color.  I have a few upcycling ideas that I want to use them for.

This dress and bolero jacket looks plain in the photo but it has some really nice lines to it and it fits me.  It needs work, washing and mending minimally.  I may have to dye it as well because I don't think all of the discoloration is going to come out. It was only 2.50 so not much is lost if it doesn't work out.
 Hopefully only friendly ghosts hitchhiked back with these items!

Wednesday, October 01, 2014

Tuesday, September 30, 2014

Retro Art Show


I am pretty excited to share this!  I recently got accepted into a local art gallery show called "Retro".
I decided to make something that reflected some of my favorite stuff and ideals:
 vintage packaging, toys, housewifery, fun and cute.

I call the piece "Don't Act Your Age". 
 It is an adult sized package of play dishes reminiscent of old five and dime store offerings.
In preparation and research for the piece, I created a "Mint in Package" vintage toys pinterest board .

I don't generally work with paper and plastic (clay is my preferred media) so I certainly had some challenges pulling everything together.  I also have a general mantra of only using what I have on hand and if I don't have it then it better be cheap, from a thrift store and/or involve using a coupon.  So maybe I set myself up for frustrations when I can only work within those limitations (?). 

On to contruction: The primary part is made from a large piece of cardboard (free from Lowes).  The grey gingham print is wrapping paper (cheap from Target).  I thought it would work best since I needed a large piece of decorative paper. Also gingham is very "tablecloth" looking which works because of it being a dish set.  It was horrible to work with (crinkling and tearing).  If there was ever to be a 'next time', I would use fabric.  I got the plain white plastic plates at a thrift store.  They were part of a cheap crappy picnic set but the right style for what I was wanting to portray. I added the cute kitty cat images and grey and black polka dots made from paper.  

The letters/words were done by typing them up on my computer and printing them on a laser copier for best quality.  I then individually cut them out with an exacto blade. I am sure a more technically advanced person could have found an easier way.  I then glued them down using Xyron sticker maker stuff (used a coupon). I covered the package with clear vinyl (another coupon).


I found the image of the kitties on the nets:


I had an issue figuring out how to hang it,  but worked something out using a large wood paint stirring stick, wire, and nylon plastic screws and nuts.  They are all concealed under the top flap. 
 I am pretty pleased with the entire outcome of the piece.  I had never entered a show at this particular gallery so that was another exciting part as well.  It is housed in the original courthouse (non-functioning) of my town dating back to the early 1900's.  

Miscellaneous Additional Tidbits: 
At the show opening, Hubs and I dressed the "Retro" part by wearing vintage attire.  

I found this adorable mid century chair in the lobby area of the gallery and had to have my picture (several) taken with it!


Monday, September 22, 2014

Pea Patch Pocketbooks

Pea Patch Pocketbooks!

I love the name and they are so adorable!
I saved the above vintage recipe image from the nets to try out. Only the resolution was not the best when I went to read the instructions. So I had to decipher what I could and just make the rest up.

My results:

I could kinda make out some of the ingredients : Peas, leftover meat, pastry, celery salt, worcestershire sauce, gravy, additional gravy...

So basically it's leftovers with a crap ton of gravy in a pastry crust on a bed of peas!  I can do that!  Forget the celery salt and worcestershire sauce, just add more gravy.
I have been doing a bunch of recipe experimentation (just making stuff up!) lately.  I made a really good baked tarragon chicken dish with quinoa last week and froze the leftovers.  Perfect for this dish!

I started by making the gravy, since it seems to be a vital component in this dish.  I used the leftover drippings from the baked chicken and followed Mr. Goss' Gravy recipe (from Aunt Bee's Mealtime in Mayberry Cookbook ~The Andy Griffith show).  Be careful not to spill the gravy! As Mr. Goss, the only dry cleaner in Mayberry says, "...gravy can make awful spots! It is no joke, No siree! Takes alot of good work to clean it off proper. People just don't realize!!"  The recipe doesn't call for cleaning fluid to be added as Andy had suggested (this way the gravy stain could just take care of it's self.)

I then combined the gravy, chicken, and quinoa together.  I threw some peas in the mixture for color and cohesiveness. For the pastry, I used Jiffy (jiffy I love you) pie crust.  I made the pastry as instructed on the box and then rolled out and cut into 5x8 inch strips (I could decipher that from the recipe).  Next, add a tablespoon or so of the leftover mixture on lower middle of each strip and fold over pastry. Moisten edges and roll up.  Prick top with a fork and brush with milk.  Bake on a cookie sheet at 450 degrees for 15-20 minutes.  Meanwhile mix peas with as much butter as you think your arteries can stand. Cook on stove top and dash with seasonings of your choice.  Place peas on a serving dish. After the pocketbooks are done, snuggle them into their pea patch.  Top the pocketbooks with some pimento. Then to finish everything off, place a little pillow of butter in the middle. 

These turned out so yummy!  Just stuff some pastry with gravy, leftovers, peas...done!

I am not sure why my "pockets" turned out looking like they came off  the back of a husky, wide-load pair of pants though.


Wednesday, September 17, 2014

Birthday Gifties

I got a whole bunch of cool stuff for my birthday...(The Easy Bake Oven for instance).
  I also got this vintage 1964 Mary Poppins Board game!  The game is fairly basic.. roll the dice and move along the board. It's the graphics and layout that make this game really Supercalifragilisticexpialidocious!
You start off at number 17 Cherry Tree Lane and then proceed to Bert's sidewalk chalk drawings, next a tea party on the ceiling and the horse races.  Then off to a fox hunt and kite flying.  At the end of the game there is a cardboard spinner carousel wheel.  If you are the first to reach it and spin your player to his appropriate spot then you win the game!

I also got a super cute 1951 (there is tag on the underside from the factory with a date!) formica table. My favorite thing about it is the grey wood grain-like pattern on the table top.  It is a bit on the narrow side (with the leaf in place it is 4 ft by 2.5 ft.)  so maybe it was intended as a breakfast table.  However, it is going to be perfect to use a desk and addition sewing/craft space.
I also got 3 Mayberry/ Andy Grifftith cookbooks with episode inspired recipes from my mom!
Can't wait to try some of them out!

So there are the highlights of my Easy Bake Oven Birthday party.
Time to clean up the wrapping paper and the sprinkles all over the floor now!

Tuesday, September 16, 2014

Birthday Hoopla Light Bulb Baking

I just recently celebrated my birthday and apparently I turned 10 again!
  I had myself an easy bake oven party!
First up, decor and activities!
I asked Hubs for a vintage Easy Bake Oven (circa 1964) for my birthday and he found me one in good condition on ebay.  It came with the original box, mixing bowl, mini spatula, rolling pin, and 3 baking pans.  No cook book but recipes are easy to find online or just use Jiffy.
I got it several weeks in advance so we could give it some test runs on cookies and mini pies.  Even with it being 50 years old it still produces fabulous and yummy results.
 In preparation for my party, I baked several mini strawberry cakes for us (Hubs, PB, and myself) to decorate with icing and sprinkles.
I think you can figure out which ones I decorated and which Hubs and PB did!
For some simple party decorations, I put up a few paper lanterns and attached printouts of these adorable vintage reproduction Mini Food Boxes that were originally for use with Easy Bake Ovens or any rival brands (Simple Simmering Stove?) during the late 50's/ early 60's.  I also placed some of the little boxes on the sideboard and table for more Easy Bake Oven ambiance. 
Easy Bake Ovens are really great to use for portion control (each pan can only hold 1/4 cup) and because it takes about 15 minutes to bake each serving, having seconds is usually not going to happen.  But since it is so fun to peer into the little baking chamber and then decorate your own treat it doesn't quite seem like a bad deal.
Next up....more cake!

Cockroaches and Cake

For my main birthday cake I used a vintage fancy cake/mold pan and a bunch of pink, green and white icing.  Now don't panic! That cockroach is a friend!  We always put a little plastic cockroach on our birthday cakes and sing Happy Birthday to the La Cucharacha tune. Perfectly harmless, sanitary and sane.
Here is an image of the cake with it de-cockroached. 
 I was going for a fancy look with the cake icing decorations so it would be similar to my little hair piece:

It only took about 10 minutes to put the Happy Birthday hair assemble together.
It is just a printed image on a piece of photo paper with a tuft of netting and a hair clip glued underneath.
Now that the candles are blown out....bring on the gifts!

Tuesday, September 09, 2014

Dinner is Served!

 As some may have caught on by now...I love vintage food packaging.  Vintage TV dinner boxes are especially cheek-pinch-able-cute!   But they can get even cuter if they are mini sized!
 I like to collect scans of food packaging that include the entire box...front, sides and back.  I print them out on card stock. Then just cut, fold and glue together.  
But to make them even more pleasant and presentable, I glue a magnet on the inside (so to not ruin the images on the backs) and now they can hang out on the fridge promoting quick and convenient aluminum tray dining!

 Visit my Grocery Market pinterest board and bring your "shopping cart"!  You can find these box images and a ton more to fashion your own!  
Make a kitchen's worth for a little one (or yourself, like I would do!) to play house with!

Tuesday, September 02, 2014

School House Rocks


On the first day of school this year, I went a bit overboard with the "table-scape" . I pulled out all of the vintage Fisher Price school related items along with a newly obtained one for display.  It's PB's last year of elementary school which means expect more exorbitant hoopla over the next several months on the topic.  It's my last year of elementary school too! Boo! Last year of class parties, fun field trips, and PB wanting me to come have lunch with him at school.  I have been dreading this final year for those reasons and more but I really feel that I grasped on to the former years and savored them best I could.  But watch out fifth grade!  Everyday is to be respected because I know it will be gone before I know it.

Ok, drying tears...Let's move on to something cute!

I found this great 1959 magnetic learning easel over the summer,  for a mere couple of bucks at a thrift. 

Adorable graphic!

It came with the original box.

The back of the box shows other Child Guidance magnetic learning boards/products.

I have kinda started a elementary school/ childhood bucket list for PB.  Some of the things we have marked off the list are simple but stuff I feel every kid should get to do. Some things like:
  • Eat old fashioned candy such as Wax Bottles and those white with brown stripes peanut butter bar deals...yum!
  • Make Jiffy Pop..As much fun to make as it is to eat!
  • Camp in the backyard
  • Feed the Birds
  • Fly kites
  • "Grill" hotdogs over the flame of the stove
  • Build forts from bed sheets
Those are just a few. One thing we realized we have never done was give his teacher an apple.  Just an apple seemed a bit too simple though.  So I decided to make his teacher a loaf of apple cinnamon bread instead.  It went over well!
Appropriately, I made the accompanying card featuring an image of a vintage Fisher Price Happy Apple!