Thursday, October 31, 2013

Halloween 2013...Beatniks!

 Like, this Halloween we went as Beatniks, you dig? 
 We, cool cats, decided to make the scene at a way out java hole for a wild pre-halloween hootenanny.  What a gas!
 We wailed a bit, but so not to be headed for crashville...
  We got our kicks and we had to like split, man... we had Squares to like beat out for candy, you dig? Trick or treating! It's crazy, man, crazy!

The idea for us to be Beatniks this year came from Ned Flanders' parents on The Simpsons':

"Oh, man! Ned spilled ink all over my poems. He's a real flat tire, I mean a cube, man. He's putting us on the train to Squaresville"  

We found a few "totally with it" vintage beatnik ads and images while searching the nets while noodling out our get ups:


We came up with a few crazy accessories to like tote around....a set of bongos, a cigarette holder, our own coffee cups, portable jazz music and "Frankie" the cat from the beatnik film 'A Bucket of Blood', 1959:

A frustrated and talentless artist finds acclaim for a clay covered dead cat (with a knife still stick in it) that is mistaken as a skillful statuette. Soon the desire for more praise leads to an increasingly deadly series of works.


We had most of the threads on hand, PB just had to grow himself a Goat!
All night, we snapped our fingers to the crazy beat and spouted off random poetry in a beatniky slow voice:
" Hey Andy...Why don't you be handy and like give me some that candy"
in place of the regular "Trick or Treat".

Catch ya on the flip side Daddy-O!
We got a bongo drum full of chocolate to like chow down on man!
Halloween Continues!


Every year at our house, Halloween decorating starts in Sept and continues to stay in place into Nov.  If Christmas can linger for several months at the stores then Halloween certainly deserves the same respect.  So, MHICTY is going to have several posts with the date as Oct 31 in observance,even if it's November.

Take advantage of the Halloween items/candy on clearance and have a post-Halloween celebration too!  Make candy bark from the leftover Halloween candy!  Carve a half price pumpkin!  Parade around the house in some of the rejected costume items that didn't turn out to be the big seller the stores expected!

Leave me your ideas in the comments section of ways you would continue the Halloween festivities!

Bone Soup


 For the past 4 years I have read "Bone Soup" by Cambria Evans to Pumpkinbutt's class on Halloween.  The past 2 years have been difficult to make it happen due to one teacher saying "Halloween isn't a real holiday"  and another teacher afraid someone would get offended.  But after begging, pleading and clearance from the principal the tradition has prevailed.
Let me clarify here... I don't just read them the story, there is a whole performance involved and a treat at the end. The story is a Halloween version of "Stone Soup" with imported stewed eyeballs, bat wings and frog legs, to name some of the ingredients. The main character, a skeleton-type cutie named Finnigin, is a wanderer in search of a Halloween feast.


Finnigin places a dry old bone (a magic bone!) in the town's largest cauldron and draws out the reluctant townscreatures to contribute to the soup. As each ingredient is placed in the soup in the story, I add the same item into a large plastic cauldron.   I made all the ingredient's packaging to look just like they do in the book.
With Imported Stewed Eyeballs, the soup becomes tasty...

But what flavor Bat Wings add!

 With the addition of Frog Legs, the soup is fit for a king!

And with a final dusting of slime and sludge (plastic spiders, flies, other creepy crawlies)  the soup is declared ready!
This year, instead of giving them a large cookie bone or goodie bag containing Bone Soup type items when the story is over, I decided to take it up a notch....I had them build their own Bone Soup in an edible chocolate cauldron as the story was read!

Each kid got a little zombie-hand bag of edibles... Eyes, batwings (pumpkin spice candy melt molds of bats), gummy frogs, Halloween colored sugar sprinkles with a small candy bug (slime and sludge) and of course a magic bone (a small candy sprinkle bone).

I made the cauldron cakes from this recipe.  Mine did not turn out near as cute as hers!

Here are a few of the kid's Bone Soup creations!:


This year's presentation went really well.  As I told the story and directed the kids on what to open and add next to their mini cauldrons, PB took care of the large cauldron and it's soup contents. 
And best of all, the kids and PB had a great time.  His school does not allow but a couple of parties each school year and Halloween gets bumped usually.  I try my best to make sure the kids get something since I think it's the best and most important holiday there is. (sorry Christmas...you are second place.)

Next year will be the last year we get to do Bone Soup as PB will be in 5th grade...have to make it extra spooktacular! 

As a side note, I highly recommend everyone who loves Halloween to own this book, it is a staple and has become a tradition that PB and I look forward to reading each season.  

Wednesday, October 30, 2013

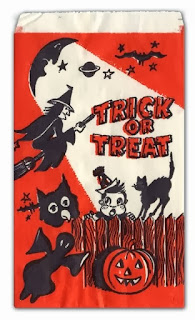
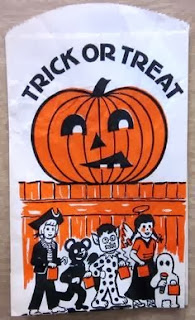
Vintage Halloween Bags


Here are some images of vintage Halloween treat bags that can be printed and added to plain white bags
to spook them up a bit, just in time for trick or treaters!


These images are great for making banners out of as well. Or printed on to fabric and made into throw pillows....ideas for next year!

Tuesday, October 29, 2013

Witches fingers

  We made witches fingers for a Halloween treat!  And when a few broke....
They became goblin toes!

Ingredients
1 cup unsalted butter, softened
1 cup powdered sugar
1 egg
1 teaspoon almond extract
1 teaspoon vanilla extract
2 2/3 cups flour
1 teaspoon baking powder
1/4 teaspoon salt
3/4 cup almonds (whole or sliced)
1 tablespoon raspberry jam

Directions
On medium speed, beat the butter, sugar, egg, almond extract, and vanilla extract in a mixing bowl for 2 minutes or until fluffy. Combine the flour, baking powder, and salt. Add the flour mixture slowly to the butter mixture. I like to switch to a wooden spoon. I don't want to break my mixer. Refrigerate for about 30 minutes.

Preheat oven to 325F.

Take heaping teaspoon size pieces of dough and roll them into logs that are the shape of fingers. Use your hands to make knuckles and indents on the fingers (look at your own to decide where they should be placed). You can use a knife to make the indents. Place an almond on the tip of the fingers where the nail should be.

Arrange the cookies on parchment lined baking sheets and bake for about 20 minutes or until lightly golden. Let them cool for a minute then remove the almonds from the fingers and place a small dab of jam into the space before pressing the almonds back onto the cookies. 

Monday, October 28, 2013

Ellie's Halloween 2013 Costume


Ellie's costume this year is Frida Kahlo. 
I had everything needed for it already on hand.  Her rose hair adornment headband is made from scrap black t-shirt fabric with artificial roses sewn on it.  She got the dress for christmas last year from her "grandmother".
 Her uni-brow is an upside down fake mustache sticker.


Sunday, October 27, 2013

Fun for Halloween!


"Crayola windows" must have been an idea submitted by a Crayola Maker that hated his mother, other children, and maybe even furniture. Hear me out....  Children, rub the entire surface of a piece of paper with ANY available household oil!  There's motor oil in the garage! Why not?  And then tape it on a window.... sorry but tape is not going to stick to oil. And guess what! That greasy mess is going to slide down the window and on to the sofa.  Mother is going to be so thrilled!

But "Crayola Ghosts" is an awesome idea and I would enjoy doing that one myself.  A fun twist would be to have each child in a classroom draw a ghost and write a spooky message with white crayon on white paper.  Then have them collected, mixed up and passed back out.  Each child would then apply black water color paint to reveal their surprise ghost and secret note.

I am not going to comment on "Scare Faces" other than .......lame.

Tuesday, October 22, 2013

Creepy Vulture Pumpkin

 Here is the pumpkin this year!  Inspired by a Martha Stewart design.  I had to alter the pattern and instructions a bit.  The primary cage pumpkin is suppose to very large and the vulture is made from a smaller pumpkin. My cage pumpkin is more of a medium-ish, so I had to cut off the bottom section of the cage template.  For the vulture I was not going to buy another pumpkin to just use 1/10 of it, sooo.... I improvised some.  I made the vulture out of black craft foam with skewer sticks hot glued to it's back and jabbed them into the base.

I added a few ideas and touches of my own.  I painted a spider web design  all over the outside of the pumpkin with black acrylic paint.

I also added a nest on the bottom of the "cage" made from black Halloween hay (it's like pillow stuffing just black in color) and Spanish moss.  I cut up a small plastic skeleton and placed in a picked -over-bone-pile.

I found a few pumpkins of Halloween past for your viewing pleasure:
2011
2010
2005
 I guess I didn't carve a pumpkin the other years due to a pumpkin shortage crisis?  Not sure...

Monday, October 21, 2013

Historic Halloween Tour

 We attended the Fall Festival in our downtown historic distinct this past weekend.  Two of the houses on the tour date from the Victorian period. For the festival they are opened to the public (for free!) and feature three different Halloween themes/short lectures: Day of the Dead, Victorian Halloween traditions, and Victorian Mourning Rituals.(To see last year's festival it is posted here. Some of the information and displays were the same as last year so I only posted images about the new stuff today.)
Seen above is the The Dorr house, 1871.  The Dorr house featured the Victorian Mourning Rituals display and information.
 As seen below the presenters were dressed for the occasion! 
Inside the house were several examples of woven hair mementos and jewelry.   All of the mirrors were covered with black fabric as would have been the fashion in Victorian times.  
 A photo album showing mourning photos and attire.  There also were post death photos on another page in the album.

 Funeral Notices

And I forgot to mention that the Dorr House is considered to be one of the most haunted houses in our town!  This certainly added to the aura during the tour.


 Victorian Halloween traditions were covered in the Lear-Rocheblave house (1890). The presenter gave a history and examples of parlor games played and party invitations/decor.
There were antique Halloween postcards and crocheted cob webs, a Victorian Halloween decoration.  


At the outdoor kitchen house we were given a history of Halloween, Dia de los Muertos and watched Pan de Muertos being made in a dutch oven in a fireplace.
 The outdoor kitchen
The final baked bread.

This is the second time we have attended the festival and I love it, even if some of the information is the same.  I hope they have it every year!  The historic district also hosts several haunted walking and trolley tours at night that feature the morbid history of some of the homes and buildings in the downtown area that we plan on attending when PB is a bit braver.  He refuses to go into the Dorr house!

If you want to see more from last year's festival, drag your wretched bones over here.

Friday, October 18, 2013

Spooky Strawberry Cake Batter Bars

 The best way to represent Halloween  (It is October!) while participating in a bake sale fundraiser for breast cancer awareness...... Pink Spooky Strawberry Cake Batter Bars!


I did alter the recipe a bit.  I used a strawberry cake mix, not lemon or chocolate.    Also I did not want a layer of icing (not easy to unwrap saran wrap from) so after the 25 minutes of baking I mixed everything together and baked another 10 minutes or so.  I added colored sprinkles in the batter and small white skulls and bones on the top. 


Vintage Dennison Halloween Seals


I found a few cute vintage halloween images of packaging and ads recently on the nets that I thought I would share.  The previous post was one as well.  

I save soooo many images with intent to make them into banners, cards, stationary, t-shirt designs... 
The four seals shown here could easily be printed out (laser would be best choice) and apply diy lick-able seals with flavored jello on the backs!

I wish I knew what the other two seal designs were....