Friday, December 28, 2018

Christmas is a wrap


Just a quick Christmas wrap up post.  The hardest part for me about Christmas is the gift buying/making.  So, so many factors play into this:  I am not good at gift selecting, all of the adults have waaay too much junk as it is,  we don't want any more random stuff ourselves, I don't like shopping in 'new stuff' stores, and I don't like spending gobs of money. 
What I usually do every year as one of the gifts is to give home baked goods because they don't take up any space except around the waistline.
This year I did it a little different and I think it was better on my holiday mental state of being.  It really is one of those moments when you smack yourself on your forehead and say, "geez, why have I not done this before?"  Usually with the baked gift I put it in one of those aluminum pans with the paper topper, like for take out.  I use these because I can cover the paper lid in cute wrapping paper and then when the treats are gone, the container can be recycled, leaving the recipient with nothing to take up extra space.  I happened to stumble on a blog or something through clickety clinking around that was about upcycling and using stuff from thrift stores as gifts.  Ohhhh! That's a fun idea!  It seems so obvious that it's what I should have been doing this whole time.  We pretty much buy everything used in our house, but our families don't, so I have been shying away from it.  I decided to start by seeking out interesting containers for the treats for each person's interest at thrift stores. I had about 6 different ones I needed to find.  I was pretty happy to find neat and interesting ones for everyone on our list.  A couple of cute vintage Christmas ones for friends, a hand painted Japanese bamboo tray for my mother -in-law that lived in Japan, a ceramic golf ball shaped vase for my stepfather, a plastic chip and dip tray with lighthouses for my grandmother, a simple uncluttered no frills (her decorating style) glass centerpiece bowl for my sister-in-law, and best of all, a vintage aluminum colander for my mom.  I used my amazing June's Miracle Cleaning Cloth to polish everything up to a high shine, looking brand new!  I then packed up the treats in the containers and wrapped them in some clear cellophane with white snow flakes (bought an entire roll from a thrift for 25 cents) and curling ribbon.  They looked fantastic and everyone loved them.  This made Christmas shopping not so stressful and aggravating for me and I enjoyed hunting for the perfect vessel in places I like to shop.  I think I am going to venture more into gift giving for next season through this way.  I have a whole year to search for stuff!

Another new thing that we did this year was put up our cardboard fireplace on Christmas eve so we had someplace fitting to hang our stockings (we don't have a fireplace).  I don't have room for it to be up with the holiday decor for the entire month so it's nice to be able to have it up even if it's for one night.

Our Christmas went pretty well this year, with minimal whining and complaining "Well, this might be my last Christmas" from family, so for that we are truly grateful! 
I hope everyone else had that same 'peace on earth'!
Thursday, December 27, 2018

Cranberry Tree Salad


For dessert on Christmas day I used another tree shaped pan to make this 1958 recipe called Cranberry Tree Salad.


{Better Homes and Gardens December 1958}
Oh my goodness!  That cute little holly elf in the corner!!!!


(Click on recipe to enlarge)


I trimmed down the calories and sugar in the salad by using sugar free jello, 4 packs of artificial sweetener, and only 1/3 cup of sugar. I also used low fat cream cheese and crushed pineapple in it's own juice.  It turned out tasting really good and light.  We have too many cookies, treats, cake and sugary loaves hanging around this place so this is a nice guiltless option!


Now, of course, I had to figure out how to construct me a cutie pie little holly leafed styrofoam noggin elf to accompany my dish!  The magazine did not give instructions of how to put one together.  I bought a 'bouquet' of holly leaves and the styrofoam ball at a thrift (again, part of the big bag o' christmas stuff I got for 5 bucks).  I carefully cut the holly berries apart and painted a couple with black nail polish.  I trimmed the leaves from the plastic wire stalks.  I carved a scrap piece of foam into a cone shape for the body.  You could buy a styrofoam cone but I was just using the debris I have around the house.  I cut some of the wire stalks to make arms, legs, and a neck, then jabbed them into the body.  I then hot glued all of the leaves over the armature and head.  Lastly I glued his eyes and nose in place.  I still need to spritz him with some 'snow' (white spray paint), add his holly buttons, and make him a permanent support base. 
I could see making a little army of these to decorate a christmas buffet table or stash them here and there all over the house!

Wednesday, December 26, 2018

Cini-Sausage Breakfast Bundles


For Christmas Day I made good use of a couple of Christmas tree shaped baking pans I picked up at a thrift store.  The first was by making this breakfast dish.  It is the other recipe I submitted for the Pillsbury Bake-Off last year, which I called 'Cini-Sausage Breakfast Bundles with Apple Dunking Sauce'.

As I mentioned before, one of the things that I found trying (for me and my creative food experimenting ways) was all the exact timing and micro precise ingredient measurements when I submitted my entry.  While I did submit the required OCD steps to the contest, I am not going to do it here.  It's not hard and I don't see the point of making it complicated.  It could be turned into a convoluted advance math problem by precisely calculating out how to have the exact measured dough bits for the exact number of cut pieces of links but I think we all have more important things to do...like hot gluing something to something.   Also some packages of links have more or less than others which can add to the issue.  So here is the simple version of my recipe:

Cini-Sausage Breakfast Bundles
Ingredients:
Precooked turkey sausage links
a tube of cinnamon rolls
 applesauce
Set oven to preheat for the temperature indicted on the rolls.  Cut links into thirds.  Unroll cinnamon rolls one at a time and give them a gentle stretch for extra length.  Wrap small amounts of cinnamon roll around each piece of cut sausage.  Repeat til all materials are used up.  Place bundles in a greased pan close to each other.  Bake.  Drizzle top of bundles with the included icing. Serve with applesauce for dunking.

I like to make my own applesauce but that would have made my recipe submission too many ingredients and steps for moderns.  Also, I don't use Pillsbury Cinnamon Rolls, I use the store brand because guess what!!!  The Pillsbury ones aren't rolls, even though they say they are on the package...they are BUNS.  The dough does not unroll which is the primary characteristic of a ROLL.  Duh.  I use generic "Great Value" cinnamon rolls because they know that a roll, unrolls.


I usually make these up the night before, place pan in the fridge, and then just pop them in the oven in the morning.
I like to use different shaped pans also.  The first time I made them I used a round cake pan and arranged them like a wreath, placing the bowl of apple sauce in the middle.  At Halloween I used the skull pan, a heart pan for Valentine's Day, or serve them on skewers for National Something on a Stick Day (every March 28)!

Tuesday, December 25, 2018

Duck and Cover!


(fam photo edited by PB!)

Hope your holiday is fallout free!


Enjoy this perfect yule tide carol by Weird Al
"Christmas at Ground Zero"!

If the radiation level's ok,
 I'll go out with you and see all the new mutations on New Years Day!

Monday, December 24, 2018

Merry Christmas from Ground Zero!


This year for Christmas I went with an Atomic Town-Fallout Shelter theme.
The idea came to me after acquiring a big box of putz houses at an estate sale last year.  They had been stored in a hot humid attic for decades and were in bad shape...atomic blasted looking to me.
I set them up as a crack house hood last year but all the while I really had plans for this.


I displayed a few of the most blasted dwellings and pieces under the tree, complete with fire crackling looking lights and a big mushroom cloud in the center.  The box of houses also came with some crumbling bottle brush trees which would look horrible if I was going for a high rent district, but they completely work for being radiation infused!

For our main Christmas tree I went with aluminum which works best for the space age theme.
Here are a few of the handmade ornaments I put together: 
Mushroom clouds
(made from scraps of cardboard for the base and stem, white plastic bag and cotton for the cloud, and hot glue holds it all together.)

Canned foods,
such as this Fallout Safety pack of powdered skim milk.

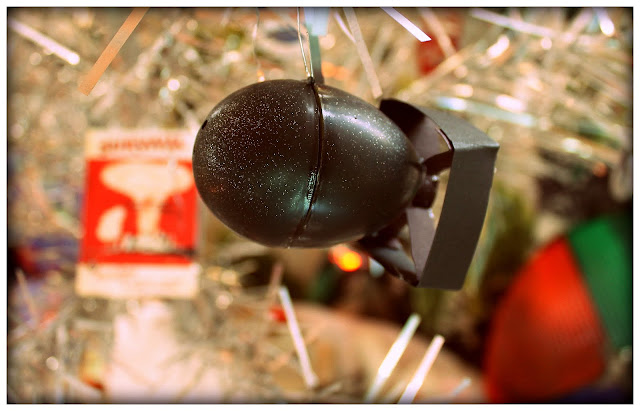
A-bombs
Made from Easter eggs, spray paint, paper, and hot glue.


Blasted and singed glass ornaments.
This one doesn't look very smokey, but I spritzed all of the ball ornaments with black spray paint.

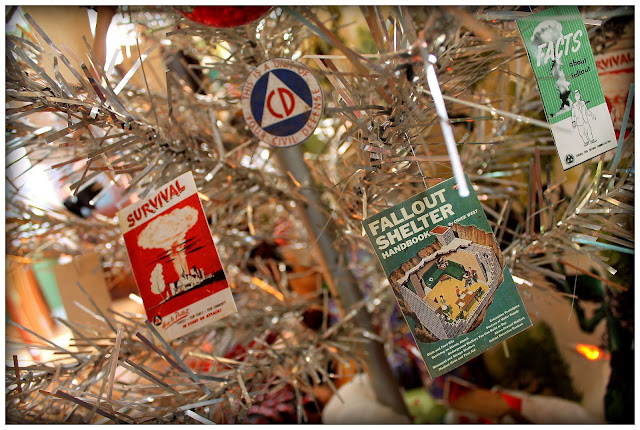
Various prints of civil defense propaganda.

Another view


Bert the Turtle as the angel on the top of the tree! 
I should have made him some wings and a crown but time had run out.

The whole tree and village.

I also made a few blasted mutant mannequins (dollar tree Blarbies) similar to what they did during atomic testing in the 1950s but they were just too big to put on the tree and really too big to place around the town (Attack of the 50 feet women!) So I came up with placing them together in a tall glass vase with a few aluminum tree branches as a table center piece.  
 Don't forget to duck and cover this Christmas!


Fallout Shelter Entry Wreath


Here is the front door wreath done up atomic style!


Fallout Shelter handbook images, mini cans of multi-purpose food, and pom poms of fallout debris scattered around!

Sunday, December 23, 2018

Snowman Switchy


Do ugly utilitarian items bother you?  Like boring switch plate covers?  It was really dragging down my Christmas decor on one wall so I put together a quick cute fix!  

BEFORE:


AFTER:

I bought the cover at a thrift for 25¢.  I cut out a switch plate sized piece of  some cute retro snowman wrapping paper I picked up last year at TJ maxx. (Side note: It's a great place to find vintage looking wrapping paper!  Just got some this season with cute Santas all over it.)  I then mod podged the paper to the cover along with giving it a protective layer on top from greasy dirty fingers.  Let dry over night and then switch out the dull boring cover for a fancy festive one!
 I did another cover as well so my room will be all matchy-matchy and it will be pretty easy to switch these out for the season every year.
I'll have to find some neat vintage looking Halloween paper to make a set for the best holiday of all!

Saturday, December 22, 2018

Kitschmas Decor 2018


I just love vintage kitschy Christmas stuff.    I have been collecting for 20 years and still love finding 'new' pieces.  95% of it came from thrift stores for cheap which is another thrill for me. I decided to go all out and used just about everything I own this season.  My house is on Kitschmas overload this year! In the words of Clark W. Griswold: "Dear, dear Francis. I hope this adds to your enjoyment of the holidays!"


The green display shelf and focal wall in the living room.


The top shelf is elf turf this year.


Mall Santa class picture.  Say Ho ho ho!  As you can see on the left, I reduced down the mini Santas in his belly so the ones left can now have a good view from the belt.


A familiar sound and quote around holiday time in my house (Halloween/Christmas) is "SHHOOWWP, Thud." and "What fell this time?'  I think this house may be built over the center force of gravitational pull.  I have tried all sorts of products and ideas to get stuff to hang on the wall on a temporary basis but it all fails...tapes, command stripes, tacks... I don't like putting nails in the walls for temporary decor but this year I just went for it and wound up hammering at least 13 nails. I am hoping stuff will finally stay put. The above image is the product of 3 nails.  I really like the arrangement on the walls so I think I will see if I can leave the nails in and use them every year.


Here is a fun little decor deal I came up with on a whim.  I was trying to find a way to display the 'new' Christmas tree topper, and I tried it out as a finial on one of the lamps and it fit!


These plastic Christmas ornaments were part of a big bag of Christmas stuff I got for 5 bucks.  I was trying to douse everything with some holiday cheer so this plant got accessorized.


Santa and his new reindeer pal hanging out with the noisy clanky color wheel I hodge podged together from a couple of broken ones picked up from thrift stores and estate sales.


The 'new' lamp infested with styrofoam elfin magic.


This is another project/idea I have been wanting to do for a couple of years and made it happen this year.  I had an old rusty record holder rack that I fixed up and put all of our Christmas albums in.  We like to listen to them every year but I wanted to also have them out to be seen and easily accessed.


And speaking of displaying records I hung a couple on the wall this year.  We just found the 'cat in the Christmas box' record this year and had to display it somewhere!  Still need to listen to it though.  One of my favorite Christmas albums is "Jingle Cats" but I don't think cats are singing on this record.  The other record I hung up is a Dennis Day and Jack Benny album.  We love Jack Benny but can pass on Dennis Day, which occupies 99% of the content, so it can stay in a frame.


The Santa Choir meets every day to rehearse on top of the china cabinet in the dining room.  You would think that by now they would know the lyrics to "Jingle Bells".


The sideboard in the dining room.  PB has plans of decorating this tree in a theme of his choosing this year but for now "the little lights aren't twinkling."

Jingle all the way to these posts of Christmas past:
2017

Friday, December 21, 2018

Cutie Pie Snowman Cake


I made this cutie cake for a get together with a couple of friends.  Since it is a small cake it is perfect for just a few people.  I made the hat from a large marshmallow and graham cracker that I coated in black candy melt.  The facial features and buttons are also black candy melts that I daubed and shaped with a spoon and chop stick on waxed paper.


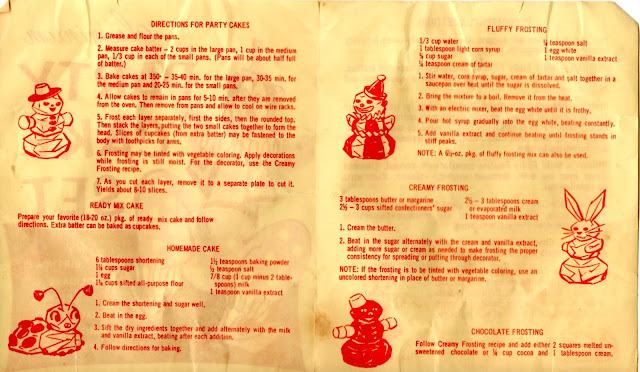
 His base is from a set of vintage cake pans I picked up at a thrift a few years ago, but I bet other pans can improvise.  The original booklet came with the set including all sorts of reasons and different versions of characters that can be constructed.


I'm not sure what birthday, holiday, picnic, special event, anniversary, or seasonal treat calls for a "brownie" though.

❄❅❆❄❅❆
Let it snow! If it's cake and coconut!
Here is another cutie snowman cake I made in 2014.

Thursday, December 20, 2018

Santa in a Sock


Here is a new way I came up with this season to display all of the small Santas.  I put them in a vintage mesh net Christmas stocking I picked up at a thrift a few years back.  I remember when I was a kid these stockings were always for sale filled with grandma hard candy at TG&Y for cheap.  This is the only one I have come across for many years though.  It's just sheer and flat enough that all of the Santas can be easily oogled...unlike the old way I displayed them:


In cannibal/kangaroo Santa's belly!

Wednesday, December 19, 2018

Gift Wrapped


These 'gift wrapped' Firestone record album covers are perfect for making Christmas gift boxes out of!  It's a craft project I came up with several years ago and I am finally getting around to making them this year!


First pick out some Christmas albums with front covers that have most of the action in the middle section.  
Next, cut the front cover from the back.  The front is the top of the box and the back is the bottom.  Start with the front cover by turning it over and marking 1 1/2 inches around the edge.  When marking press down slightly with pencil.  (This will serve as a blunt scoring and make folding the edges over more straight and easier later.)  Next cover your marks with packing tape as shown above on all four lines.


Now, using a exacto knife or box cutter make slits on all four corners as shown above.  Fold all edges over to form the box lid.  The top is going to crack on the folds, just be aware. The bottom of the box is made the same way as the lid except to get it to fit under the top it must be measured a smidge over 1 1/2 inches.


Here is the lid folded on the edges.


At this point you could hot glue the edges and be done.  I am always thinking about how I will store something and how can I have it take up the least amount of space.  I decided the best way was to have the box fold down flat as most gift boxes do.  I considered using velcro on the corners but for quick use this year I came up with another solution.  In the four corners of the lid and bottom, where the big "X"s are seen above, I applied some clear packing tape.  I then folded the tiny flaps inward and used scotch tape to hold it solid.  Since I have packing tape where the scotch tape is applied, it can be easily peeled off after use and not mar the album cover.  I can then fold the boxes flat for packing up and use them every year!

These boxes are also great to use as decoration under the tree before Santa drops off the big stash on Christmas Eve!


For another record gift box idea check out my:
Apron Record Gift Box