Thursday, October 31, 2019

Halloween 2019 Wrapped up


Wrapping up all the loose bits from our 2019 Halloween.
This year was a bit on the tame side.


We were glad to see Krispy Kreme brought back Halloween themed doughnuts, and bonus points for giving them fun names like Slimon.


Mr. Husband and I went to the fair and saw an amazing Elvis impersonator, Thane Dunn.


Here is a horribly blurry picture from a Halloween party we went to.  Our friends who hosted it had some amazing vintage Halloween decor set up inside and out along with a retro Halloween Shiny Brite ornament bedecked orange tree!

Like I mentioned earlier, things were tame his year.  I honestly was not in the 'holiday spirit' and I yanked down the decor on Nov. 2.
Oddly enough, I have been really excited about Fall/Thanksgiving decorating and crafting.  Very very weird. 

M-I-C-K-E-Y!


M-O-U-S-E!

Our 2019 Halloween Fam costumes...
Mouseketeers!


I typically have our costumes planned out very early on.  However, the last couple of years I have had to let inspiration strike me last minute.  Everything came together really well even with little time.


I made our ears out of black craft foam and attached them to headbands.  The boy's t-shirts came from dollar tree and mine (girly fitted tee) came from Joann on sale for 3.50.  I stamped the names on the shirts using letters from a kid's alphabet foam puzzle I picked up from a thrift for 1 buck.  Everything else from the waist down we already owned.
I can definitely see us using these outfits again for future parties or even to wear to Disney World.  I doubt PB will be game on that last one but Mr. Husband and I will surely do it!

PB used his Photoshop skillz to fix up the photos.  The first one is set on a backdrop of a vintage coloring book back.  The second photo is our shed that he "moused" up.

Noodle Brain and Rest in Peas


For our Halloween dinner I put together this baked Mac and Cheese brain ( based after this recipe) with a side of  Rest in Peas.  Around the brain are buffalo chicken bites...can't think of a spooky name for them.  Their scary enough since they are a frozen processed convenience food!


The original recipe's website has very detailed instructions but for posterity I am going to summarize it for myself here:

Recipe:
Zombie Brain Mac and Cheese Mold

2 boxes Mac and Cheese
12 oz fat free evaporated milk
3 eggs
1/2 cup shredded cheese (mozzerella, provolone, parmesan, romano, fontina, asiago = Italian style blend)

Preheat oven to 350 degrees.  Prepare a round 2 1/2 quart oven safe bowl by spraying the interior of the bowl with cooking spray, line the bowl with aluminum foil, then spray again with cooking spray.  Set aside.  Boil noodles til 1/2 done.  Drain and set aside.  Combine the powder cheese packets, milk, eggs together in a large pot/bowl, whisking together well.  Add noodles and shredded cheese to the mixture.  Pour into prepared bowl and bake 45 minutes, or until an inserted butter knife doesn't have any unset cheese sauce.  After baked, remove from oven and let set for 10 minutes before unmolding onto a serving platter.  Remove foil.  Garnish with meat balls, chicken wings, cocktail wienies...ect. and zombie hands!  I bought these online several years ago.  They are cupcake picks.

Helpful tips:  Give the unmolded brain a squeeze to make it more of an oblong shape.  Press a fissure line down the middle with a butter knife.

We all really liked this recipe even though it was made from box mac and cheese.
Halloween dinner is always a quick fix (well it did take 45 minutes to bake though!) kinda thing since we have to get out the door for Tricks or Treats, but I would like to make this all again but healthy it up.


Ghost Pie


Deadsert for our Halloween dinner was Ghost Pie.
PB designed the ghost!


The official name for this dessert is actually Snow Ghost Pie, but after reading the story that accompanied the original recipe from 1972, I am leaving off the snow part.  We live in Florida and no matter how many slices of pie we leave out for the ghost we are unfortunately not going to get any snow. It also sounds like the Snow Ghost Pie attracts unsavory types.
The story is really...odd and I don't want to think about it for too long.  But I do like the idea of having a tradition like this to do every winter season.

Here is a blurry copy of the recipe:


The pudding part of this pie is heavenly!  I substituted coconut extract and that made it over the top delish!  I used a prefab frozen pie crust to save myself some time and didn't care for it much.  I want to try this pie again and use a pecan crust.  

The weather here in Florida is 80 percent sweltering humidity and 90 degree heat and then bam! for a few days it's so cold I consider burning the furniture to keep warm.
Instead of a hope for snow I guess I could call this "Could we at least get some weather that resembles winter for more than 2 weeks" pie!


Bostie-O-Lantern


Our jack-o-lantern this year!
A sweet baby boston terrier!
I found the stencil on the nets.


Here's our Bostie Baby, Ellie, modeling along side the Bostie-O-Lantern

Check out our past O-Lanterns:
A Finger Lickin' Pumpkin
Hat Box Ghost-O-Lantern
Creature-O-Lantern
More O-Lanterns


Happy Halloween Spooky Spooks!


Happy Halloween creepy crawlies, ghoulies, and goblins! 


It's just me!


In my most adorable DIYed Halloween costume/outfit.


Here is my Halloween costume I made this year, based after a vintage 1978 kid's vinyl set I picked up last year at a thrift store (seen below).


I thought it was so adorable but it was a kid's size small and certainly wouldn't fit an adult.  Besides, these costumes are sweaty suffocating heat death traps.  I decided to set out to make my own adult version, preserving the cute style but keeping comfort in mind.


I have been working on this idea for almost a year!  I already had an A line dress pattern in my stash that I had picked up from a thrift store years ago.  I then needed yellow fabric.  Fabric stores are too pricey, so I kept my eye peeled for a yellow sheet.  I eventually found one at a thrift for only 2 bucks!
Next I had a life sized large format print made of my witch image at the library.


To transfer the image onto the fabric I used carbon sheets.  I got these at an estate sale.  I had to cut the print into sections and do it piece by piece.  I then painted  everything with fabric paint (already had in my stash).
The entire dress cost about 10 bucks to make.  The most costly part was the bias tape I put on the edges.  I decided after seeing these photos that the bottom of the dress needed to be trimmed out too, so I have added more to the edge.  To represent the original plastic mask, I made a little hair fascinator from a printout of the witch's mask.  It is just hot glued to a piece of craft sheet foam, then a hair clip hot glued under that.


I remember very well how hot and suffocating it was to wear these masks when I was a kid.  I now know why!  There are no nose holes and what breath you can intake is through the tiny pin hole opening on the mouth!  But the great thing about wearing a mask is you don't have to worry about making a perfect smile or wonder if your make up or hair style is still holding together, you just look toward the camera!

Trick or Treat!


As always, Halloween day will commence for a bit longer on here as I post all of our doings from Hallows Eve!


Wednesday, October 30, 2019

Demented Decor 2019


Welcome Foolish Mortals...to my Demented Halloween Decor Tour!

Same spooky stuff just shuffled around a bit!


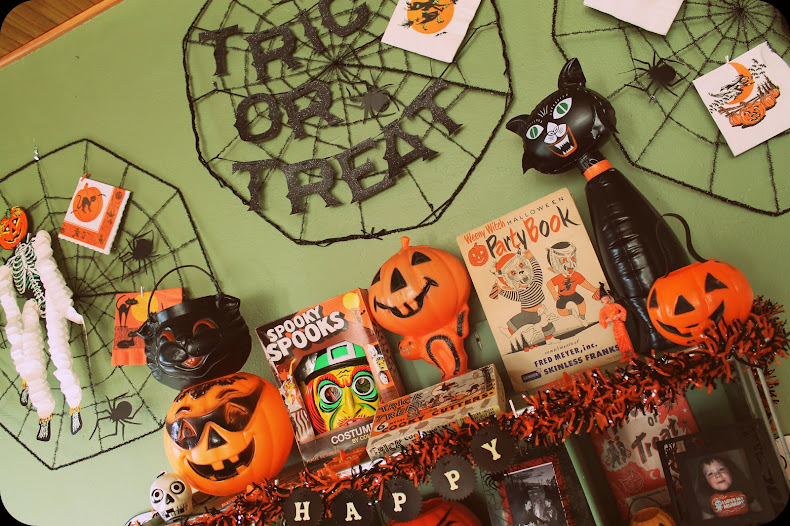
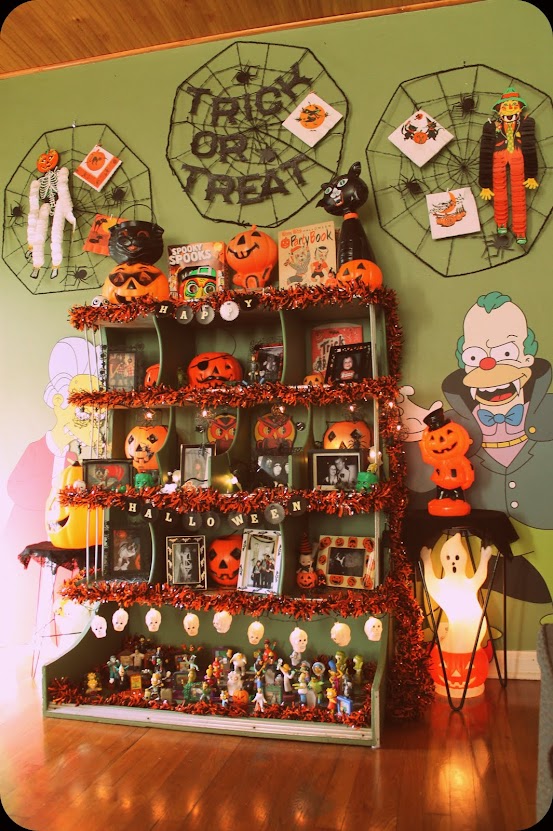
The Gruesome Green Shelf!

In the living room, I clipped the 'new' Halloween napkins on the spider webs placed on the walls.


I picked up more of that super cute retro orange and black garland from dollar tree to edge the shelves with this year.  I'm not sure about it.  It looks a little too bushy.


The Deranged Dining Room!

Same layout but I mixed it up just a bit.


On the sideboard I showcased the 'new' scarecrows and blow molds.


A flurry of bats!

The curtains in the dining room are accented with little cardboard bats behind the sheers.  The bats were part of a craft kit I picked up at Target on clearance a few years back.  The craft was based after this kind of DIY example, having fiberboard hoops and notches to attach the threaded bats into.  Once it was made it looked pretty good, but storing it and then untangling it was a nightmare.  I eventually ditched the hoops and kept the bats for future crafting, such as this!  I wrapped the thread around the middle of the bat and used it as an anchor to put a pin through, attaching it to the fabric, between the sheers.


The Mad Scientist Mortuary!

This area is pretty much the same each year.  I added black spider webbing onto the lamps though.  


A Creepy Corner!

Usually I only show 3 or 4 primary spots of Halloween decor on here, but there are all sorts of other little spooked up nooks in the house, I just can't get them to photographer well.  This is one of those crannies that I was finally able to capture.  It is the end tables between the living room furniture.

Even though I did a lot of the same styling in the decorating as I do each year, it still took me about 3 days to get everything done.  I read somewhere that to simplify your decorating you should store each section of items together.  Such as don't store all the blow molds together but put the group that go on the sideboard together along with all sideboard Halloween decor in one storage bin.  It makes sense and would immensely speed up the process of set up but it's not practical for me. I've got too much demented decor and not enough crypt storage space!


Tuesday, October 29, 2019

PB's 2019 Mood Table


I am thrilled that PB agreed to make another Halloween Mood Table this year!  A mood table is a small vignette of micro decorating meant to be done at the beginning of the season.  For the last few years I have asked PB if he would like to make one with my Halloween leftovers I didn't use in the general decorating.  The overall mood has really already been set and sprawled among our house by that point but that's fine.  It helps to set his Halloween mood!  I don't ever pressure him into doing this little bit of decorating each year, so I am glad he took it on again.
 The 'table' is a plant stand/telephone metal rack.  Flanking the top are some cheap novelty plastic straws that came with skeletons on them, which we got at dollar tree 9 or 10 years ago.  PB had picked them out back then and named them "Bobby Bop Bop".  Bobby was a favorite name of his (see his self named baby bobby toy from when he was a tyke).  He also used these fun jiggly monsters that I can never find the right place for.  The focal point of the assemblage is the skeleton dangling from the severed hand, like a puppet.  I thought it was very clever!

Here are his past decorations:
2017 Mood Table
2018 Mood Table

Monday, October 28, 2019

Jan in a Pan...of brownies!


One of my favorite B movies is The Brain That Wouldn't Die (1962).  I don't want to spoil it for anyone that hasn't seen it but the gist is a scientist keeps his decapitated fiance's head (Jan) alive in a pan and goes on a search to find her a new body.  Jan apparently isn't into that and just wants to die.

Jan, really, let's look at the advantages of being a head in a pan.
  Fit in a bowling bag and never pay for a seat on the bus.  Save money on clothes and shoes but go wild with hats!   Eat anything you want and never gain weight!


How about keeping a full stock of brownies in your pan with you?!
That could work!  Hence I invented "Jan in a Pan...of Brownies"!
Perfect eats to have on hand while viewing the movie.


"Jan" has been actually in the making for several years.  I got the idea for making her about 3 years ago but it took some time to find all of the pieces (for cheap). I started off by getting, from a thrift store, one of those large Barbie heads that are for kids to style her hair.  I removed her shoulders and attached her head onto an inverted plastic funnel which I taped (hidden by bandage) to the bottom of the pan. I did have a great time giving her a few hairstyles before I wrapped her head in bandage material, which I got on Halloween clearance from Target.  I found the vintage enamel pan at a thrift store about a year later and the beakers are from the flea market found last year.   The whole contraption cost about 10 bucks.  Other variations could be Jan in a pan of red jello or meatloaf casserole but I felt brownies were the best option.

Here she is in black and white movie effect:


Her close-up and comparison to the "real" Jan in a pan from the movie:


The original Jan had a bunch of additional head supports but I am going to forgo these since they would only get in the way of brownie snatching!

I guess you can probably figure that Jan got her wish to die, body-less, at the film's end, but I think she made a hasty decision.  I'd be okay with living in a pan with an endless supply of little powdered sugar doughnuts, not gaining one ounce to my nonexistent hips.  Of course I'd have to have someone feed them to me...but that's what trained monkeys are for!


Saturday, October 26, 2019

Halloween Crafties: Spooky Switch Plate Covers


I couldn't handle the boring switch plate covers in my living room clashing with the festive Halloween decor so I spruced them up!  I had a few leftover prints from these candy paper sacks so I mod podged them to some cheap plastic covers.  


For the dual switch I covered the plate in black tissue paper and silver glitter before putting on the graphic.  I made these kinda fast and I sadly discovered I did not align this one evenly...That's fine because it looks a bit jaunty like a haunted house, right? 

Friday, October 25, 2019

Halloween Crafties: Cover Up


We have a television in our living room that is pretty much a big ugly dust-collecting eyesore paperweight.  We don't use it, as a matter of fact I unplugged it and all the components because I was tired of the hassle it is to sweep around the cords.  The only time the tv gets hooked up is for the holidays so we can all watch Halloween/christmas dvds together.  I would say at max it is on 5 hours a year.  If I had a place to put it during the rest of the year I would love to not have it's big black rectangle staring at me.  Since it is about to be put into use and fired up, there it will have to sit...but I came up with an idea, for it to be sitting pretty!

The basic shape and purpose of a TV screen is similar to a picture frame so I went with that.
I printed out an image of a vintage Halloween candy box on the wide format printer at our library, attached it to a piece of poster board, and placed it in the "frame"!  At this moment I just taped the image on to the screen, but I am working out an idea to hang it from the top and be interchangeable.

I am really excited about the other possibilities I could apply this TV cover up to.  Obviously I have got to find a fun rectangle image for a Christmas cover up, but then I could have several odd ones to use through out the year!  

Thursday, October 24, 2019

Halloween Crafties: Kewpie Cutie


I thought I would show off this adorable Halloween Kewpie cutie a friend made for me!  She put together several different styles and they were all precious!

Wednesday, October 23, 2019

New Halloween 2019! Vintage Trick or Treat bag


The most recent new Halloween item I got was this amazing vintage trick or treat bag as a gift from Mr. Husband just last week.
I was checking out ebay, as I tend to do and came across it with a low opening bid and no bids yet.  I told Mr. Husband we should keep an eye on it but I didn't put it in my "save".  I actually forgot about it til Mr. Husband handed it to me.  He spoils me.  He tells me that himself, usually when I super size at Whataburger.

This bag is one of those 'celebrity' (like Rosen or Rosbro) vintage items to me.  I even have a print of it on my Halloweenie garland.  I decided to not ask how much he paid for it because, unlike me, he isn't a cheapskate penny pincher.


Tuesday, October 22, 2019

New Halloween 2019! Paper Mache JOL


Check this out!  I can't believe I found this paper mache JOL at an estate sale for 2 bucks!  Inside it was this metal plastic thingy (seen to the right).  I thought it was a piece of trash or a broken part but I happen to stumble onto this 1957 ad for a similar one and turns out it's some sort of battery powered light doohickey!

 
(image source)

Mine is missing his facial features but I just stuffed him with black tissue paper and all is good!

Monday, October 21, 2019

New Halloween 2019! Blow Mold Bonanza


These vintage Halloween blow molds are my most favorite score for the season!  I came across them at an awesome estate sale back in the early part of the summer.  The JOL with the witches hat on the bundle of straw is my favorite design.  I have one already but it started to crack across the check bone and is in bad shape.  When I was at the sale I didn't want to be a Grabby Grabberton so I didn't get both of them.  I was at the sale for at least a hour and before I checked out no one else had claimed him so I had to bring the set home.  I figure it's good back up if cracking starts to happen with either one.  I have discovered about 3 of my other blow molds are starting to get major cracks when I unpacked everything this year.  I am going to have to come up with another way to store them or something.  The blow molds are my favorite of the Halloween decor. 

Friday, October 18, 2019

New Halloween 2019! Cooky Cutters


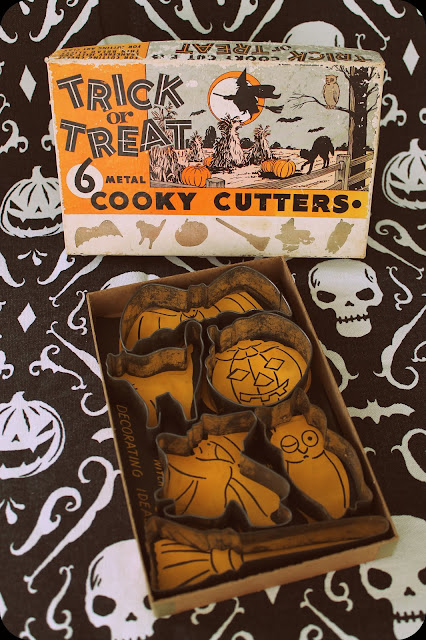
I was super stoked to find these very old, still in the original box, set of Halloween cooky cutters at an estate sale for a buck!

Thursday, October 17, 2019

New Halloween 2019! Honeycomb Scarecrows

''''


I got these two honeycomb scarecrow cuties from two different sources.  I had one of them on my Christmas wish list from ebay.  However right before Christmas I happen to come across one at an estate sale!  Mr. Husband had already bought the one I had put on my list (on the right) which is in better condition so now we have two, which works well for symmetry decorating!